Published on Thu Jan 08 2026 00:00:00 GMT+0000 (Coordinated Universal Time) by Miguel Gonzalez Herrera
🤖 Tutorial: Automate Traffic Fine Searches in the BOE with Apify and n8n
In this guide, you will learn how to build an automated workflow that checks Spain’s Official Notice Board (Tablón Edictal Único, TEU) daily for traffic notifications (fines, penalties, etc.) linked to your ID numbers, licence plates, or names.
We will use two powerful tools:
- Apify: To run an actor that extracts data from the BOE.
- n8n: To orchestrate the workflow and send notifications.
By the end, you will have a system that automatically notifies you if a relevant announcement is published.
Step 1: Prerequisites
Before starting, make sure you have:
-
An Apify account: If you do not have one yet, sign up using the button below. The free plan is sufficient, as it provides monthly usage credits to run the actor.
Create a free Apify account
-
An n8n instance: You can use n8n Cloud or have your own self-hosted instance.
Step 2: Configure the Actor in Apify
First, let us prepare the actor in Apify so it knows what to look for.
-
Find the Actor: Go to the Apify Store and search for the
teu-traficoactor. -
Test it manually: Click Try for free. In the
Inputtab, enter the search terms you want to look up. This will help you get familiar with how it works.Example
Input:{ "searchTerms": [ "1461DNB", "1234ABC", ] } -
Get the Actor ID: Once on the actor page, go to the API tab. You will see a unique identifier for the actor (for example,
legaltech/teu-trafico). Copy it — you will need it in n8n.
Step 3: Build the Workflow in n8n
Now it is time to create the automation in n8n. The workflow will be:
Trigger (Every day) → Run Actor in Apify → Check if there are results → Send Notification
1. Start Node (Trigger)
Create a new workflow in n8n and add a Cron node. This node will act as the trigger. Configure it to run once a day at a convenient time (for example, at 10:00 AM).
- Mode:
Every Day - Hour:
10
2. Apify Node
Add an Apify node and connect it after the Cron node.
-
Authentication:
- Click
Credential for Apify API. - Select
Create New. - In the dialog that appears, you will see the option to authenticate using
OAuth2. n8n will guide you through the process of connecting your Apify account securely without needing to copy and paste any API key.
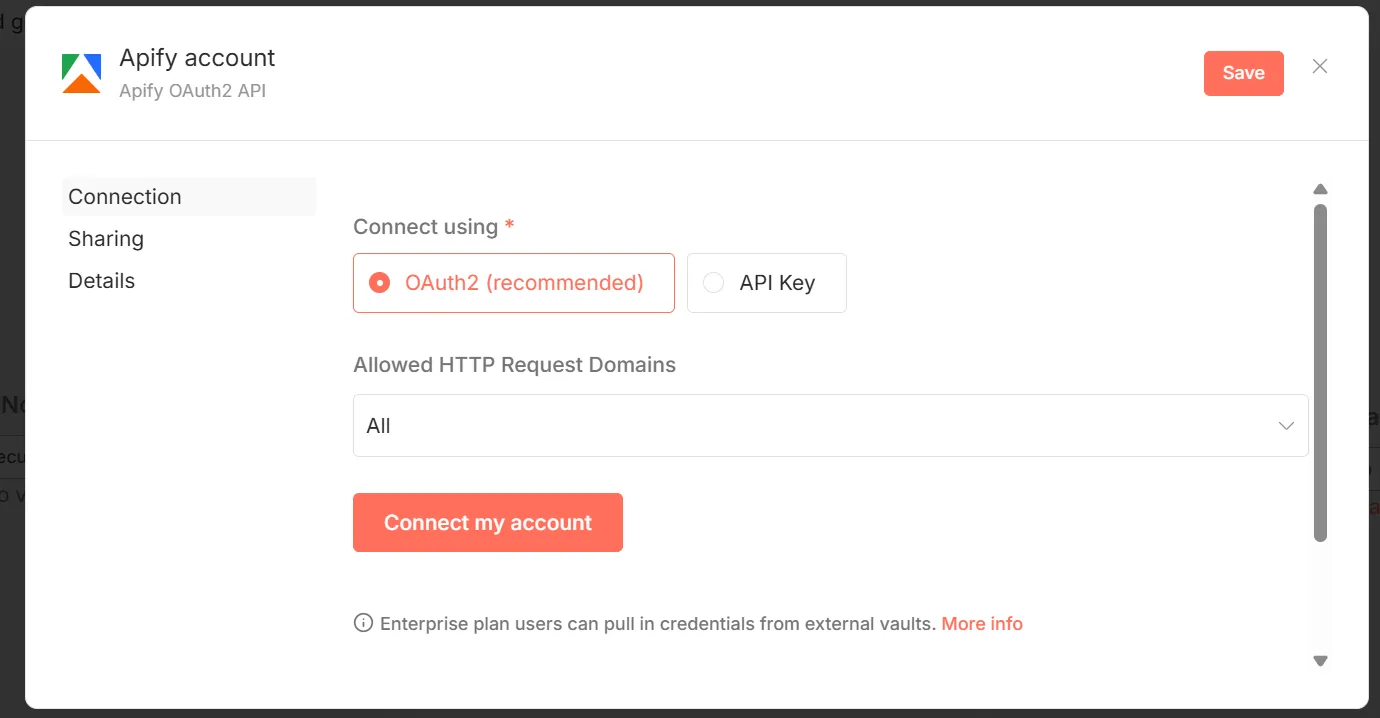
- Click
-
Node Configuration:
-
Operation: Select
Run an Actor and Get Dataset. -
Actor Source: Choose
Apify Store Actors. -
Actor: Search for and select
Teu Trafico (legaltech/teu-trafico).

- Input JSON: Paste your search terms here in JSON format.

-
3. IF Node (Conditional)
This node will decide whether a notification should be sent. We only want an alert if the actor has found results.
- Add an IF node after the Apify node.
- Configure the condition:
- In the first
Value 1field, click the gear icon and selectAdd Expression. - Use the variable selector to point to the result of the Apify node. The expression should be something like:
{{ $json.length }}. This counts how many results were found. - Operation:
Is Larger Than - Value 2:
0
- In the first
This configuration means: “If the number of results is greater than zero, continue through the true output.”
4. Notification Node (e.g. Email)
Connect a notification node to the true output of the IF node. You can use Email, Slack, Telegram, or any other service you prefer. Here we will use the Send Email node as an example.
-
Authentication: Configure your SMTP credentials to be able to send emails.
-
Email Configuration:
- To:
your-email@domain.com - Subject:
New traffic notifications found! - HTML: Enable this option to format the email body.
To create a dynamic message listing the results, use expressions to insert data from the Apify node.
Example for the
HTMLfield:<h3>Traffic notifications have been found in the BOE:</h3> <br> <ul> {{ // Iterate over each result found by Apify $json.map(item => ` <li> <strong>Search Term:</strong> ${item.json.terminoBuscado}<br> <strong>Publisher:</strong> ${item.json.publicador}<br> <strong>Description:</strong> ${item.json.descripcion}<br> <strong>PDF:</strong> <a href="${item.json.pdfUrl}">View PDF (${item.json.pdfReferencia})</a> </li> <br> `).join('') }} </ul> - To:
Step 4: Activate and Test!
That is it! Your workflow is ready.
- Save the workflow.
- Activate it using the toggle in the top-right corner.
- For an initial test, click
Execute Workflowmanually. If you have configured a search term that has results today, you will receive an email within a few minutes.
From now on, n8n will carry out this task for you every day, and will only bother you if it finds something relevant.
Written by Miguel Gonzalez Herrera
← Back to blog